Importing images in Dynamics 365 Human Resources does not have to be difficult. That is why one of our experts has set up this overview of the process to guide you through the process of bulk importing employee images into the Core HR solution.
Importing images can be done through the Data Management (Import and Export) framework. We have standard data entities for personal images called HcmPersonImageEntity. The steps that follow below show you exactly how to easily import the images into Dynamics 365 Human Resources.
Step 1:
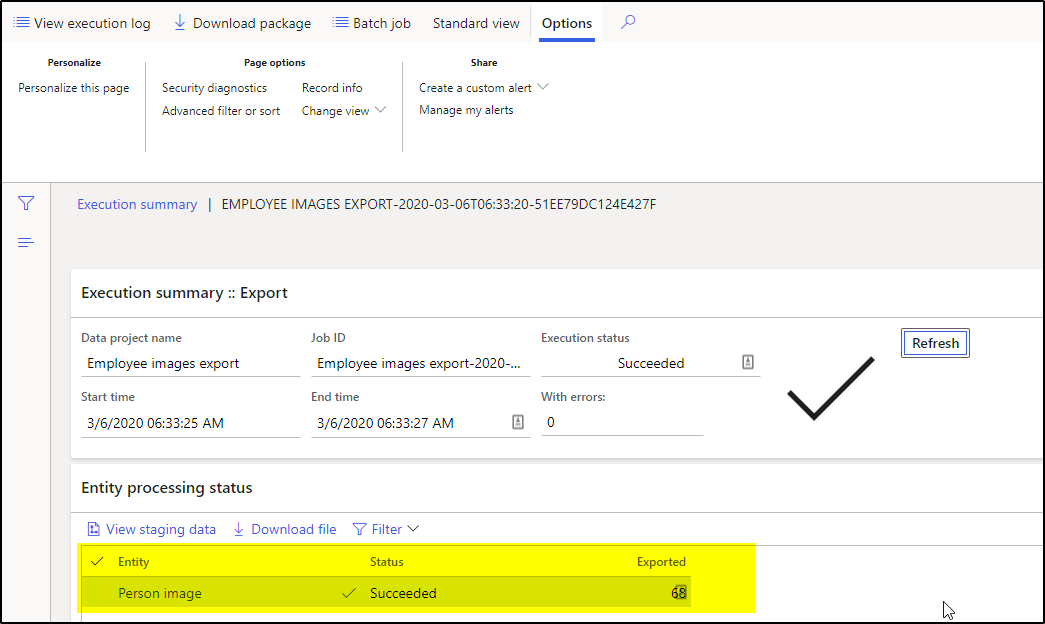
Go to Data Management > Export >> Create new export job. Add the Person image entity.

Step 2:
Click Export to export the employee images.
Step 3:
Download the package and extract the zip folder.

Step 4:
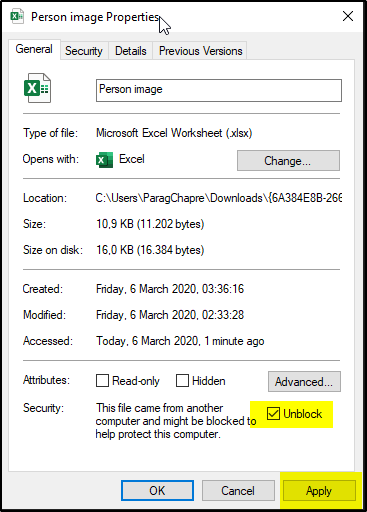
Right click on Person image excel. Then click on unblock and apply for the changes to take effect.
Step 5:
Open the Resources > person images. Delete all the unnecessary images and add only the images that you have to import. Make sure that you add the image type to the file (.png, .jpeg, .jpg). Sort the image based on the person’s name, personnel number, or party id. depending on your preferred method.

Step 6:
Open the person image excel sheet and add the images to the list matched to the correct number assigned to the staff member.

Step 7:
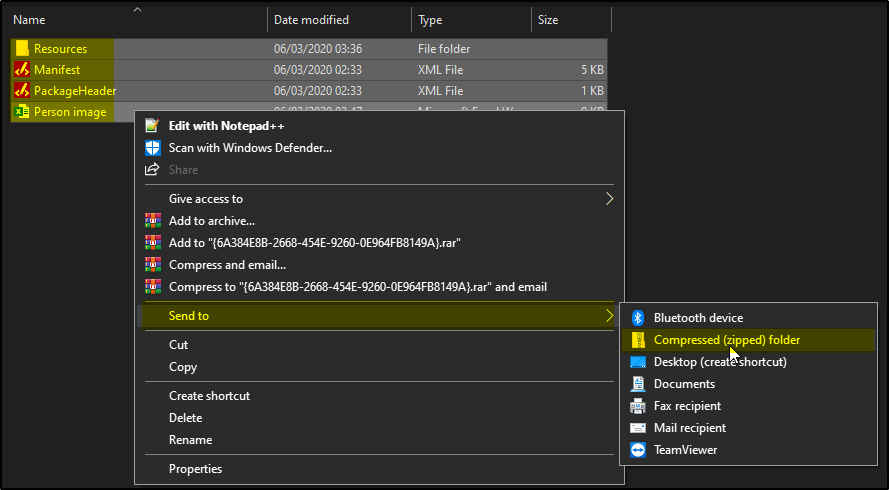
Go to folder > Select All and send to the compressed (zipped) folder.
Step 8:
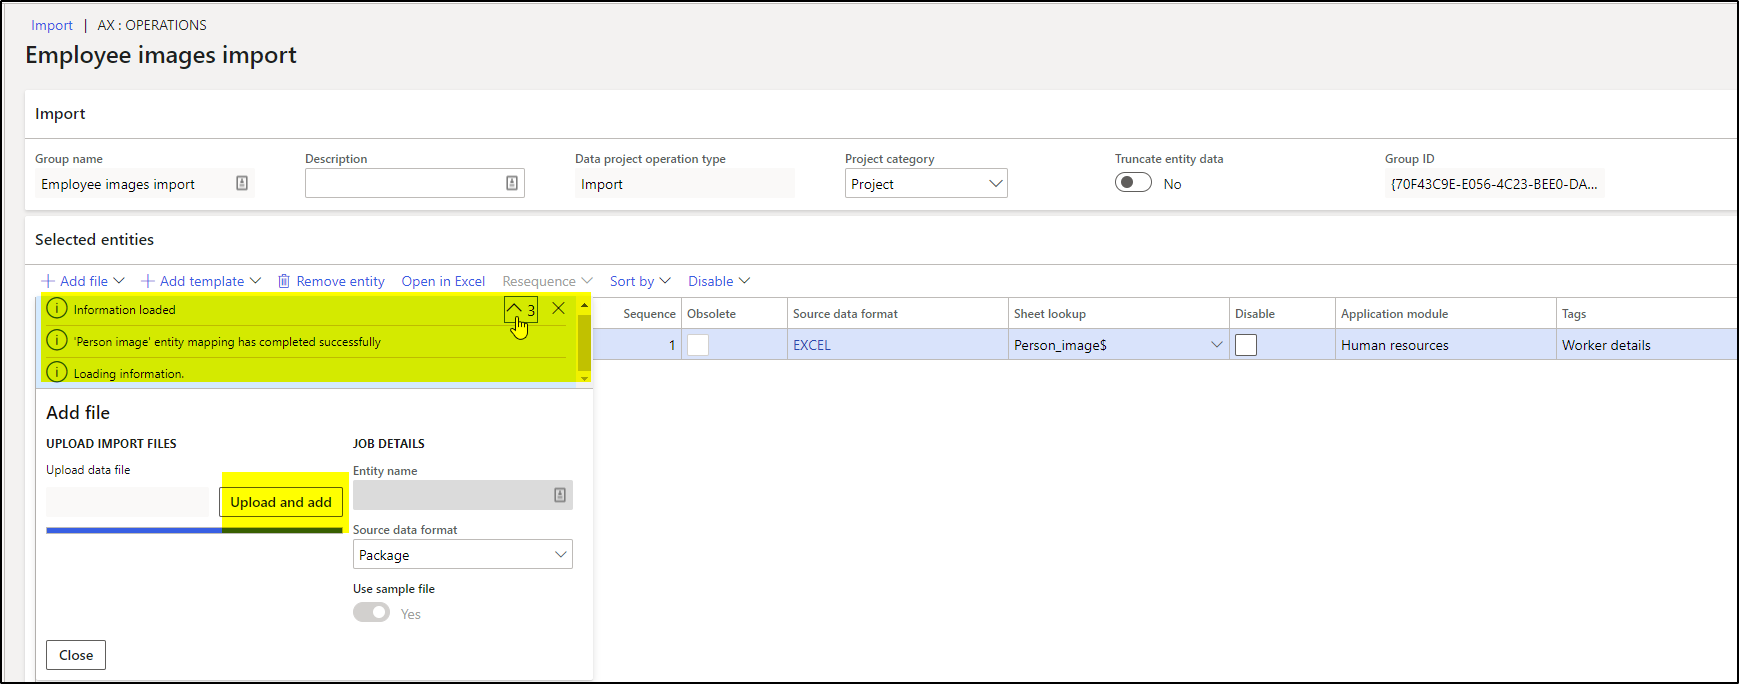
Go to Data Management > Import >> Create new and import the Zip-file as a package.

Step 9:
Click on import.
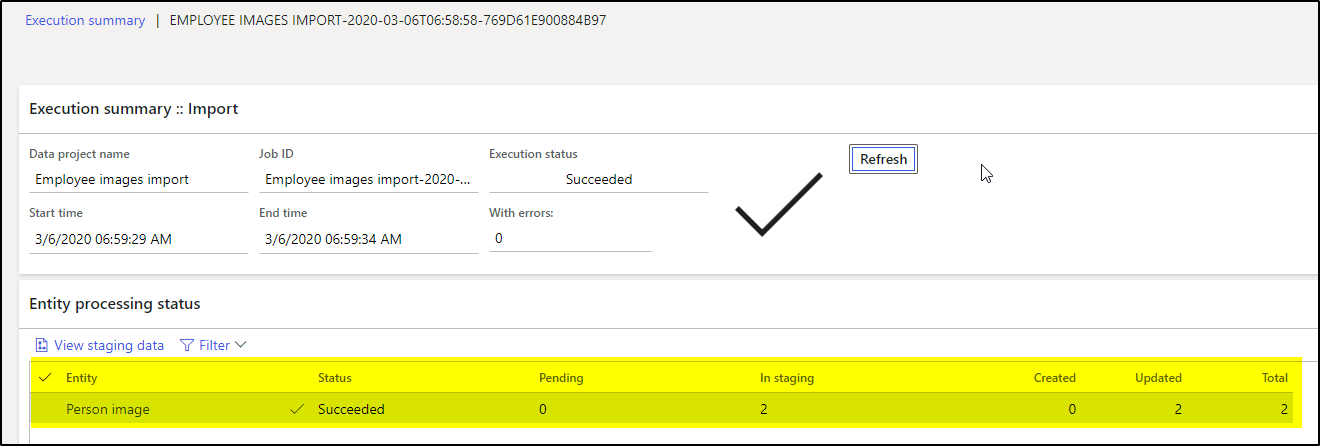
Step 10:
Two records will now be updated successfully.
Step 11:
Verify the data in the individual employees’ forms.


About us
FourVision is Microsoft’s global leading Dynamics 365 Human Resources implementation partner. We have successfully implemented HR platforms in a variety of industries across multiple Microsoft environments for over a decade. FourVision also delivers an impressive suite of Web Apps that extend Microsoft Dynamics 365 Human Resources.


